Posts tagged: recipe

A twist on Anna’s Black Bean Fiesta Soup / Happy 101 Meme

By , January 6, 2010 5:40 am

What’s better than arriving home to a fresh cooked meal?

Nothing, really.

When I arrive home and Steven has a warm dinner on the stove, ready for me to eat, I feel like a pampered princess.

Do you like it when someone else cooks for you? Whose cooking is your favorite? Or do you prefer to make your own food?

Last night, Steven made a modified (because we were missing a few ingredients) version of Anna’s (newlywednewlyveg) Black Bean Fiesta Soup.

Here are the original ingredients, crossed out with what we substituted. Check out her site for the full recipe! I hope you don’t mind that we changed it up a bit, Anna!

  • 1 onion, chopped
  • 1 3 clove(s) garlic, chopped
  • 1 tsp. olive oil
  • 1 red bell pepper, chopped 1 1/2 T. Dried Red Pepper, 1 1/2 T. Dried Green Pepper
  • 1 4. oz. can green chilies, chopped 1 1/2 Tsp Dried Jalapeño
  • 1/8 tsp. cayenne pepper
  • 1/2 tsp. chili powder 1/4 tsp. Ancho Chili Powder and 1/4 tsp. Chipotle Chili Powder
  • 1 tsp. cumin
  • 1/8 tsp. turmeric
  • 1/2 tsp. salt
  • 1/2 tsp. lime zest
  • juice of one lime 1 Tsp. Lime Juice
  • 3 2 15. oz. cans black beans, drained and rinsed
  • ADDED: 1 15 oz. can pinto beans, drained and rinsed
  • 3 cups 2 cans vegetable broth
  • 1 15 oz. can corn
  • ADDED: 1 15 oz. can diced tomatoes

Also, our favorite cornbread made a guest appearance. It went deliciously with this soup! I recommend trying the soup (either the original or our version). It was so tasty – perfect for a cold evening, and not too spicy!

Crap. I better be careful. I don’t want to turn into a food blogger. Stop making such tasty eats Steven! (no really, please don’t stop)

Time for another meme! Ayla (dainty vegan), Leah (why deprive), Kim (Adventures in Wanting) and Trayn Harder all gave me the Happy 101 award. Thank you! I am supposed to list 10 things that make me happy. Making this list was fun (I could have kept going past 10). I think I could do this everyday! Give it a try! Click “more” to read on.

Continue reading 'A twist on Anna’s Black Bean Fiesta Soup / Happy 101 Meme'»

Homemade Vegan Pizza – Dough Recipe

By , December 26, 2009 6:13 am

We LOVE making homemade pizza! It’s so fun to pick your own toppings, and it’s especially fun to make pizzas with a group of people and see what everyone puts on theirs!

But for the longest time, we were using store-bought crusts (we are still using store-bought sauce – that’s the next step!). They’re okay, but nothing special. When my coworker told me she had a great vegan pizza crust recipe, I made her send  it to me ASAP! We tried it, and oh boy, it does NOT disappoint!

The ingredients are:

  • 1 Tbsp sugar
  • 1 cup warm water (110F-115F)
  • 1/4 oz (1 envelope) active dry yeast
  • 3 1/4 cups all-purpose flour
  • 1 tsp salt
  • 1/4 c margarine or oil

Step 1: Dissolve the sugar in the warm water. Sprinkle the yeast on top and stir (if the mixture stays clear, and the yeast clumps together, the water is not warm enough – throw it out and start over). Let the mixture stand in a warm spot for 5 minutes until a thin layer of creamy foam covers the surface.

Step 2: Mix 3 cups for flour with the salt in a large bowl. Make a hole in the middle of the mixture and pour in the yeast mixture and the margarine or oil. Stir the flour into the well with a wooden spoon until it is mixed in and the dough holds together.

Step 3: Turn the dough out onto a floured surface and knead in the remaining flour. Continue to knead, adding more flour if necessary, until the dough is smooth and elastic (10-15 minutes). Form a ball with the dough and place it in an oiled bowl. Cover with a clean towel and place the bowl in a warm area to let the dough rise (45 minutes for quick yeast, 60-90 minutes for regular yeast).

Step 4: Pre-heat the oven to 500F and get your toppings ready (we use a pizza stone, so we preheat the stone with the oven because the actual bake time is so short). Once the dough has doubled in size, punch it down. Roll the ball out to form a pizza crust.

Step 6: Load up that bad boy with your toppings and slide it onto the stone – make sure to put LOTS of flour underneath the crust so it will slide. Bake for 10-15 minutes (or until the cheese starts to brown on the top for non-vegan pizza – usually more like 20 minutes).

Step 7: NOM it up! (Note: the pizza in the photo below looks messed up because we did not follow our own advice about the flour and it stuck to the sheet when we tried to move it to the stone! Oops! Live and learn!)

What are your favorite toppings to put on pizza?

I like zucchini, tomato, green pepper, lots of onion, spinach, and Morningstar crumbles. Steven likes all of that, plus olives and cheese. (Hmm, how did that olive end up on my slice in the top picture, Steven?)

We like to put garlic powder (not fresh garlic), cumin (yes mother – it can be used on pizza, it’s not just for chili), crushed red pepper, oregano and salt and pepper on for spices.

What I love about this crust is that it tastes like a crust you would eat in a restaurant! And you can make a big chewy crust on the end. Yum oh yum.

The only problem? It’s really hard to only eat one piece!

Vegan Cinnamon Rolls

By , December 12, 2009 6:50 am


Ready to go into the oven!

This was Steven’s second time making these Vegan Cinnamon Rolls from VeganYumYum. The first time we made them was in November. We had had the recipe printed out for a long time, but check it out – it’s daunting! They’re a lot of work, but TOTALLY worth it!

I wanted to find a Vegan Cinnamon Roll recipe, because as long as I can remember, that is what we’ve eaten in my family* on Christmas morning. And I won’t be with them this year… but I still want my damn Cinnamon Rolls!

Do you have a traditional holiday breakfast meal?

I was not around** to document the first step – mixing the dough, kneading it, then letting it rise. Oops. I did smell the fresh dough though – don’t you just love that smell?

I did get to watch Steven do all the fun parts though: Rolling the dough out and loading it up with butter***…

Spreading the cinnamon/sugar mix on top…

Observing your lazy cat…

Rolling the dough out…

…into a log.

Using some thread to cut the log…

… into the rolls!

Using a well buttered*** dish (ha ha)…

… to put them in.

Whipping up some vegan cream cheese frosting (using Tofutti)…

… and baking them!

Nomming away! (I forgot to take a picture WITH frosting. Duh, Kim.)

Steven made these on Saturday and we let them rise in the fridge overnight. We baked them at our friend’s house Sunday morning. You can also put them in freezer, if you want to make them in advance!

These are SO UNBELIEVABLY GOOD. I love the description of them on VeganYumYum:

If you’re looking for a healthy, low-fat, calorie conscious treat, I can’t help you today. If you’re looking for a recipe that is guaranteed to win over any vegan doubter, guaranteed to please any Cinnabon lover, guaranteed to send any child into a permanent sugar high; these buns are for you.

It’s so true. These are the real deal – melt-in-your-mouth awesome, decadent cinnamon rolls. I’m so happy we found this awesome recipe! Let me know if you try them!

*Mind you, Pillsbury made those.
**Was cleaning the house.
***We used vegan margarine. Thanks for pointing that out, Mica!

Vegan “Chicken” and Biscuits

By , December 5, 2009 7:33 am

Damn. Vegan “Chicken” and Biscuits make awesome leftovers*. Like, “I can’t stop eating them and am going to turn into a tub-tub, thank goodness that’s the last of them” awesome. Steven’s cooking is so good, I almost always feel like this with his leftovers. We were thinking about making the Vegan “Chicken” and Biscuits for Erin and Jason’s visit tonight, so we tried them out on Wednesday.


Can you spot the biscuit?

Steven followed this recipe for “Chicken” and Dumplings starting at the fourth step. We used biscuits instead of dumplings.

  • Saute onion, celery and mushrooms (we added) in margarine until soft
  • Add flour, celery salt and pepper to make a thick paste
  • Add veggie broth and bring to a boil
  • Add carrots, faux chicken and bay leaf (We used a box of Heartline’s “Chicken” Fillet** for the “chicken.”)
  • Reduce heat, simmer 20 mins, stirring often
  • Pour this awesome soupy mix on your biscuits
  • Nom nom nom away, lick plate clean

Steven excitedly told me that the biscuits had a “surprise” ingredient (before I tried one, without the soupy mix). After a lot of guesses (some silly and some serious), Steven gave me a hint that he thought the biscuits tasted like the ones you get at Red Lobster. I immediately knew what the “secret” ingredient was then – Nutritional Yeast. After my last fiasco with it, I was worried about the biscuits, but he was right, they DO taste like the ones at Red Lobster, and they taste great! (Steven used this recipe for the biscuits. He used 1/4 c. nutritional yeast instead of 1/3 c., and for the “1 teaspoon of dried herbs” used 1/2 tsp. garlic then for the other half teaspoon he used a pinch of rosemary, thyme and dill.).

We loved this recipe – especially during this time of year. It’s such a hearty and filling dish! It makes you feel all warm and good inside. And it’s got that creamy thing going on, with a little bit of a soft chewy biscuit. Yum yum. But since we couldn’t come up with good sides (besides green beans), we are making something else for our guests tonight. Ha! At least we tried something new and it turns out we love it. We*** will definitely be making it again. We both said it reminded us of when our mothers made chicken and biscuits. And Steven suggested turning it into a pot pie…

Did you have chicken and biscuits growing up? Do you like the dish? Do you know what the difference between a biscuit and a dumpling is?! If so, please tell me!

*I took them to work on Friday.
**We order this stuff online.
***By now you must know, that by “we” I most likely mean “Steven.”

Steven’s Pad Siew

By , September 10, 2009 10:57 pm

Steven has finally perfected his pad siew recipe (the one I mentioned here) and is ready to share it!

Required Ingredients:

Pad Siew

Required sauce ingredients (please note, that green top is NOT the top that comes on the sauce bottle – it is a wine topper someone gave us for our wedding).

Pad Siew

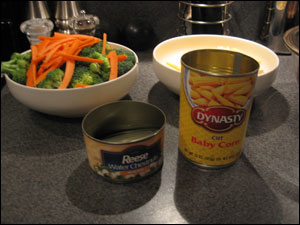
Our preferred brands for baby corn and water chestnuts.

  • 1 box lasagna pasta noodles (We use Barilla wavy lasagne. If you are adventurous, you can try the actual Thai noodles – good luck. That didn’t work too well for us – we don’t have a wok.)
  • 1 large carrot
  • 3  cups fresh broccoli florets (or a 16 oz bag of frozen florets) (The broccoli soaks up the sauce and tastes wonderful. Just be careful you don’t use too much or it will absorb all the sauce and make the dish bland.)
  • 8 oz. sliced water chestnuts
  • 15 oz. baby corn
  • 1 cup spinach (just grab a handful – it’s good for you and can’t ruin the dish)
  • 4 tbsp. vegetable oil (for stir frying)
  • Tofu, OR 6 eggs, OR your preferred protein (We like Morningstar Steak Strips (which are now discontinued!), and Heartline Meatless Meats.)
  • Vegetable oil for frying tofu (1/4″ – 1/2″ in a frying pan)

Sauce (double this if you are making marinated tofu):

  • 2/3 cup sweet soy sauce (We have to go to a special part of Chicago to buy the kind we use. It’s thick and syrupy. This is really what makes the dish. If you can’t find this, you can use regular sauce and add lots of sugar, but it won’t be the same.)
  • 1/3 cup Kimlan soy sauce (Any brand will work for this but Kimlan is our favorite – more flavor less salt.  Kikoman is also pretty good.)
  • 1 tbsp. garlic powder
  • 1/4 tsp. ground ginger
  • 1/2 tsp. crushed red pepper (add to taste)
  • 1 tbsp. white sugar

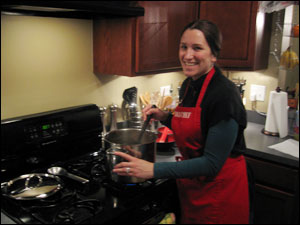
This was Steven’s first time cooking with tofu! Can you believe it? A vegetarian and vegan who have never cooked tofu?!

Well, because of this, we don’t know much about tofu and followed the instructions here. Like I mentioned in the ingredients list above though, you can use a lot of other things instead of tofu.
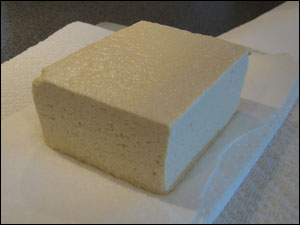
Pad Siew

Extra firm tofu.

We bought the extra firm tofu (winky wink). You drain the liquid out of the tofu, put it on paper towels, and put a heavy pan filled with water on top of it to squish the water out of it. This process takes about 30 minutes, and you have to change the paper towels often, and watch the tofu to make sure it settles straight (to keep the pan from falling over).

Pad Siew

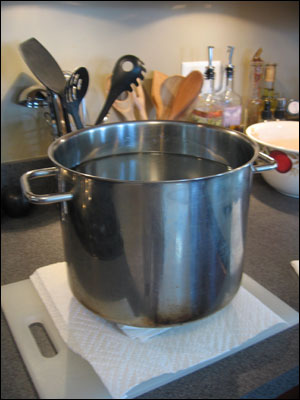
Squishing the water out of the tofu.

After you have squished all of the water out of the tofu, you cut it into the size of chunks you want (we cut ours into roughly 1-inch x 1-inch cubes). Tofu doesn’t really taste like anything, so you can fry it like it is, or marinate it. The longer you marinate it, the more flavor it absorbs. For this recipe, you marinate it for about an hour in a bowl filled with the sauce recipe x2.

Pad Siew

When you get the water boiling for the noodles, we usually put some soy sauce and crushed red pepper into the noodle water to add a bit of flavor to it (mostly just a nice aroma). It’s important that the noodles are cooked al dente, because they cook a bit longer later in the recipe.

While the pasta is boiling, you cut up all of the broccoli, chop the carrots, and open the cans of baby corn and water chestnuts. You should remove the tofu from the marinade at this point so you can use the remaining sauce (hopefully 1 cup or more!) for the main dish.

Once the pasta is ready (al dente!), you drain it, and rinse it briefly with cool water so you can handle it. You stack all of the noodles on top of one another (resist eating too many!), and cut them into three strips lengthwise, and down the middle (see below).

Pad Siew

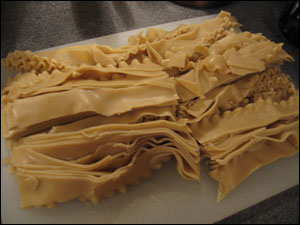
I always want to eat the noodles at this point.

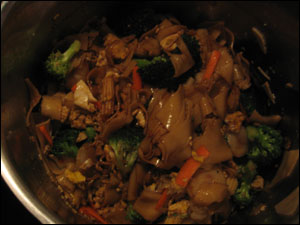
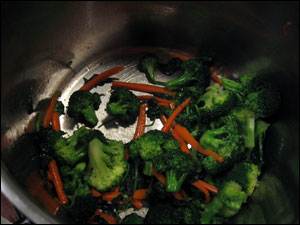
Put 4 tablespoons of oil into the empty pasta pot, and stir fry the broccoli and carrots on high heat. The trick is to keep the veggies moving around.  After a few brief minutes (you just want to sear the outside of the veggies), add the spinach and stir it around until it has shriveled up.  Finally add the baby corn, water chestnuts, the sauce, and the noodles.

Pad Siew

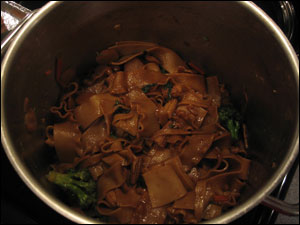
Stir it around to get the sauce on everything, then cover the pot with a lid.  Turn the heat down to low and cook for 20-25 minutes, stirring occasionally, to soak up all the tasty sauce. This is a good time to make Trader Joe’s egg rolls or pot stickers (which are vegan!), and scramble some eggs or fry your tofu.

Pad Siew

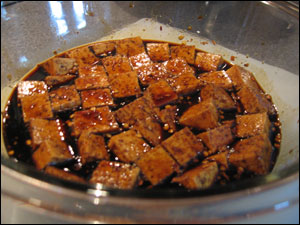
To fry the tofu, put about 1/4″ to 1/2″ of of oil in a pan on medium high. If the oil gets too hot, it will burn the tofu. The tofu cooks quickly, about 1 minute on each side. You need to drain the oil off of the tofu when it’s done, but paper towel seems to stick (perhaps a metal colander or frying mesh skimmer would work better).  If you are going the egg route, scramble the eggs  in a stick free skillet with a little vegetable oil (probably about 1 tablespoon), then add the scrambled eggs to the pot with the rest of the ingredients.

Pad Siew

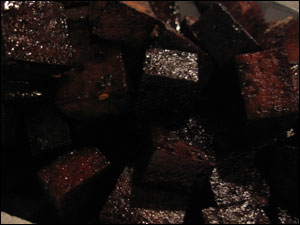
Marinated and fried tofu. Nom de nom.

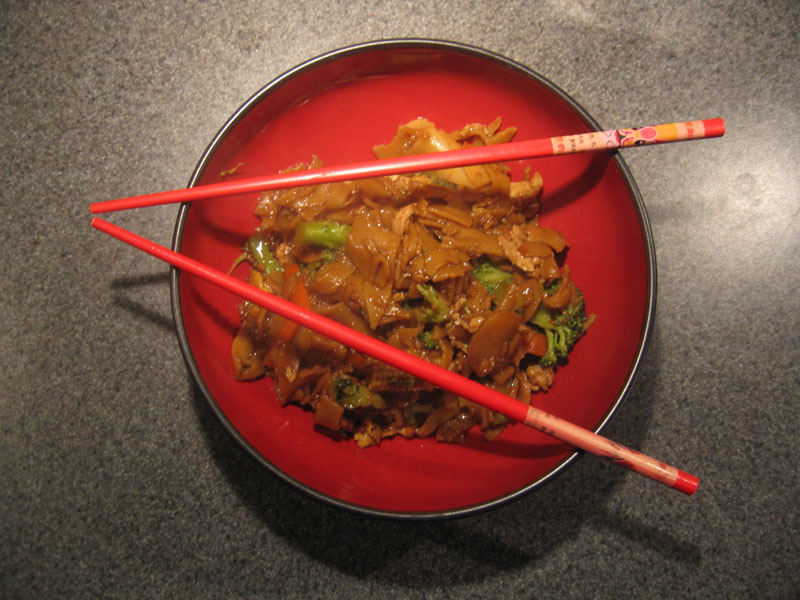
We put the dish into bowls and added the tofu on top.

The finished product!

Pad Siew

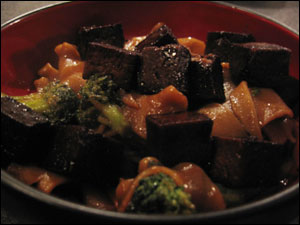
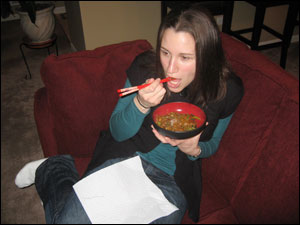
This is the kind of dish you want to make a lot of because it makes wonderful leftovers! As it sits in the fridge it just gets better and better. Perfect for taking a few bites of cold when you get home for work, or taking for lunch, then eating again for dinner (guilty of doing all three today!).

This dish takes about 1 hour to make from start to finish (not counting the tofu draining and marinating steps).

Let me know if you try it. Or if my instructions don’t make sense.

Too many cookies before bedtime

By , June 24, 2009 12:42 pm

I didn’t get home until 8:45 last night. I was a little bit frustrated that my train was late, but all of that frustration washed away when I opened the door and smelled… fresh chocolate chip cookies! Steven decided to try this vegan recipe. How awesome is it to come home to fresh cookies? Steven is such a sweetie. I am so lucky to have a husband who loves to cook and experiment in the kitchen.

image:individual vegan chocolate chip cookie

They turned out very thick on their own. Steven pressed down the second batch, but I liked the big, thick, chewy ones.

image: plate of vegan chocolate chip cookies

Nom Nom Nom

Steven had to make some substitutions to the recipe. We didn’t have unbleached flour, so he used all-purpose. And we didn’t have raw sugar, so he used half white and half brown sugar. He found out that most white sugar is not vegan, as it is often filtered using bone char – an animal product. I am sure as I continue on this vegan journey, I will discover lots of interesting tidbits like that. I will have to accommodate them when I run across them.

Anyway, he thought the cookies were a little bland, that they needed more flavor. He thought they just tasted like sugar cookies with chocolate chips in them – that they were missing that “buttery” (?) taste. I liked that they didn’t have a overpowering taste, as I generally do not consider myself a chocolate chip cookie fan. As you can see, they weren’t laden with chocolate chips. He only used a half of a cup. I don’t like it when chocolate chip cookies are overloaded with chocolate chips. Blah.

With all of that being said, I scarfed down three cookies. Then went almost immediately to bed. These cookies sat like a brick in my stomach, and had me tossing and turning all night. I don’t think it is necessarily the cookie’s fault. I think it is MY fault for eating too much, too fast, too close to bedtime, on an already full stomach.

I got into a bad pattern for awhile in the end of May and beginning of June where I was eating too much in the evening and sleeping very poorly at night. I’d wake up because I feel so uncomfortable and gassy. I would still feel gross when I woke up in the morning. That’s not a good way to start a day.

And the dumb thing is, I couldn’t figure out why I was tossing and turning all night. I just kept repeating the same actions over and over. It wasn’t until I actually slept well, that I looked back and thought, “Hmm, what did I do differently yesterday?”

So, while I’ve always laughed at the theory that you cannot burn off calories you eat in the evening* (because you go to bed), I think I will be making an effort not to eat so close to bedtime.

*I think the advice to “not eat after 7:00 pm” is meant to help people cut back on mindless snacking done after dinner. But it seems to have turned into this belief that calories you eat after 7:00 pm will never be burned off.

Friday Question #64

By , April 17, 2009 5:36 am

image: Recipes
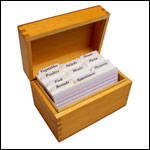
When you bake or cook, do you follow a recipe?

According to this article, most people DO NOT follow a recipe. But I almost always DO. I’m not confident enough in the kitchen not to!

Steven, on the other hand, only uses recipes and cookbooks for inspiration. Sometimes when he wants to try something new, he’ll look at a bunch of recipes for ideas, then write his own. But sometimes, he just improvises! He’s a true chef.

Some administrative stuff: On Saturday, I put up a poll asking where recipes should be posted, and the majority voted for a new recipes category, so I am adding that today. In it, you will find Fruit Pizza, Swiss Apple Pie, Banana Donuts, Granola Bars (re-visit the comments section for an update on the recipe!), the Pad Siew teaser and Christina’s Rainbow Cake. Most of the recipes for these items are posted in the comments section or in a link in the post. In the future, I will post the recipes in an extended post.

I’ve also been bookmarking a few recipes to try in the future: Denise’s Pumpkin Spice Muffins, Chocolate Covered Katie’s 24-Carrot Cake Muffins, Nicole’s Cinnamon Bun Muffins and Cathy’s Gluten-Free Brownies. Yes, I like to bake sweets! And I love to share them with my coworkers or Steven’s, so we don’t eat them all.

Kim cooks dinner: Pad Siew

By , April 11, 2009 7:11 am

image: Dish of homemade pad siew

4/10/09 Version of our homemade Pad Siew

You’d think a spouse that had Friday off and stayed at home all day (and took a 3 hour nap!) would have dinner ready when their spouse came home. Oops, not THIS wife!

Steven asked me to cook Pad Siew while he ran, and I gave him a really pained look. It wasn’t that I didn’t want to cook it, just that I was nervous about it. Steven’s the Chef, I’m only the Sous Chef. My responsibilities in the kitchen include baking, cleaning up, washing dishes, and chopping vegetables. Asking me to make this dish was a big step… for me. I guess I should consider it an honor!

Steven gave me very specific instructions then went up for his run…

A bit of history on this dish: In winter of 2008, I went to a Thai restaurant (with a buddy) for the first time and randomly selected Pad Siew, a dish with chewy noodles, sweet soy sauce, broccoli, egg and sometimes tofu (or meat). I was instantly hooked on the dish and introduced it to Steven, who also loved it… but wanted to try and make it at home. So I talked to a coworker from Thailand about the dish, and he hooked me up with the key ingredients. Steven kept making the modified recipe (we add more veggies) over and over and over until he got it very close to perfection. Steven’s still working on it though! I like to consider this one of our “signature” dishes – we like to share it with friends and family, usually with egg rolls or pot stickers – but it’s different every time we make it! The last time we made it for kapgar, tori and diane, I asked Steven to leave out the crushed red pepper, and oops, it was so bland, we discovered that IS one of the key ingredients. Sorry guys!

So I took a lot of photos while I was making it all by myself last night, hoping to share the recipe and step by step with you guys! But when Steven came down after his run, he had to do a little “re-seasoning.” He said, “Re-seasoning is when you season it the first time then tweak it in the end!” (I think he was trying to make me feel better)

So it turned out good, but he doesn’t want me to share his recipe until it is perfecto! Should I share it then? Does it look like something you’d like?

image: Homemade pad siew in the pot

Simmering on the stove…

image: Goober sous chef Kim

I look funny – my face felt sore all day Friday, especially when I was eating dinner.

image: Eating on the couch!

I am a stickler about eating at the dining room table, but we almost always eat this dish on the couch, while watching a movie. The perfect Friday night!

Just a little question – when I write about cooking/baking, do you think it makes sense to go into the “Health + Fitness” category? I don’t think I cook/bake enough to have a “recipe” or “food” category… Steven does though! I’ve added a poll below if you’d like to leave input!

In which catergory should recipes be posted?

  • A NEW category - Recipes (77%, 10 Votes)
  • I don't pay attention to the categories (23%, 3 Votes)
  • Life (0%, 0 Votes)
  • Health + Fitness (0%, 0 Votes)
  • No where - quit posting recipes! (0%, 0 Votes)

Total Voters: 13

Loading ... Loading ...

Panorama Theme by Themocracy

30 ‘queries’.